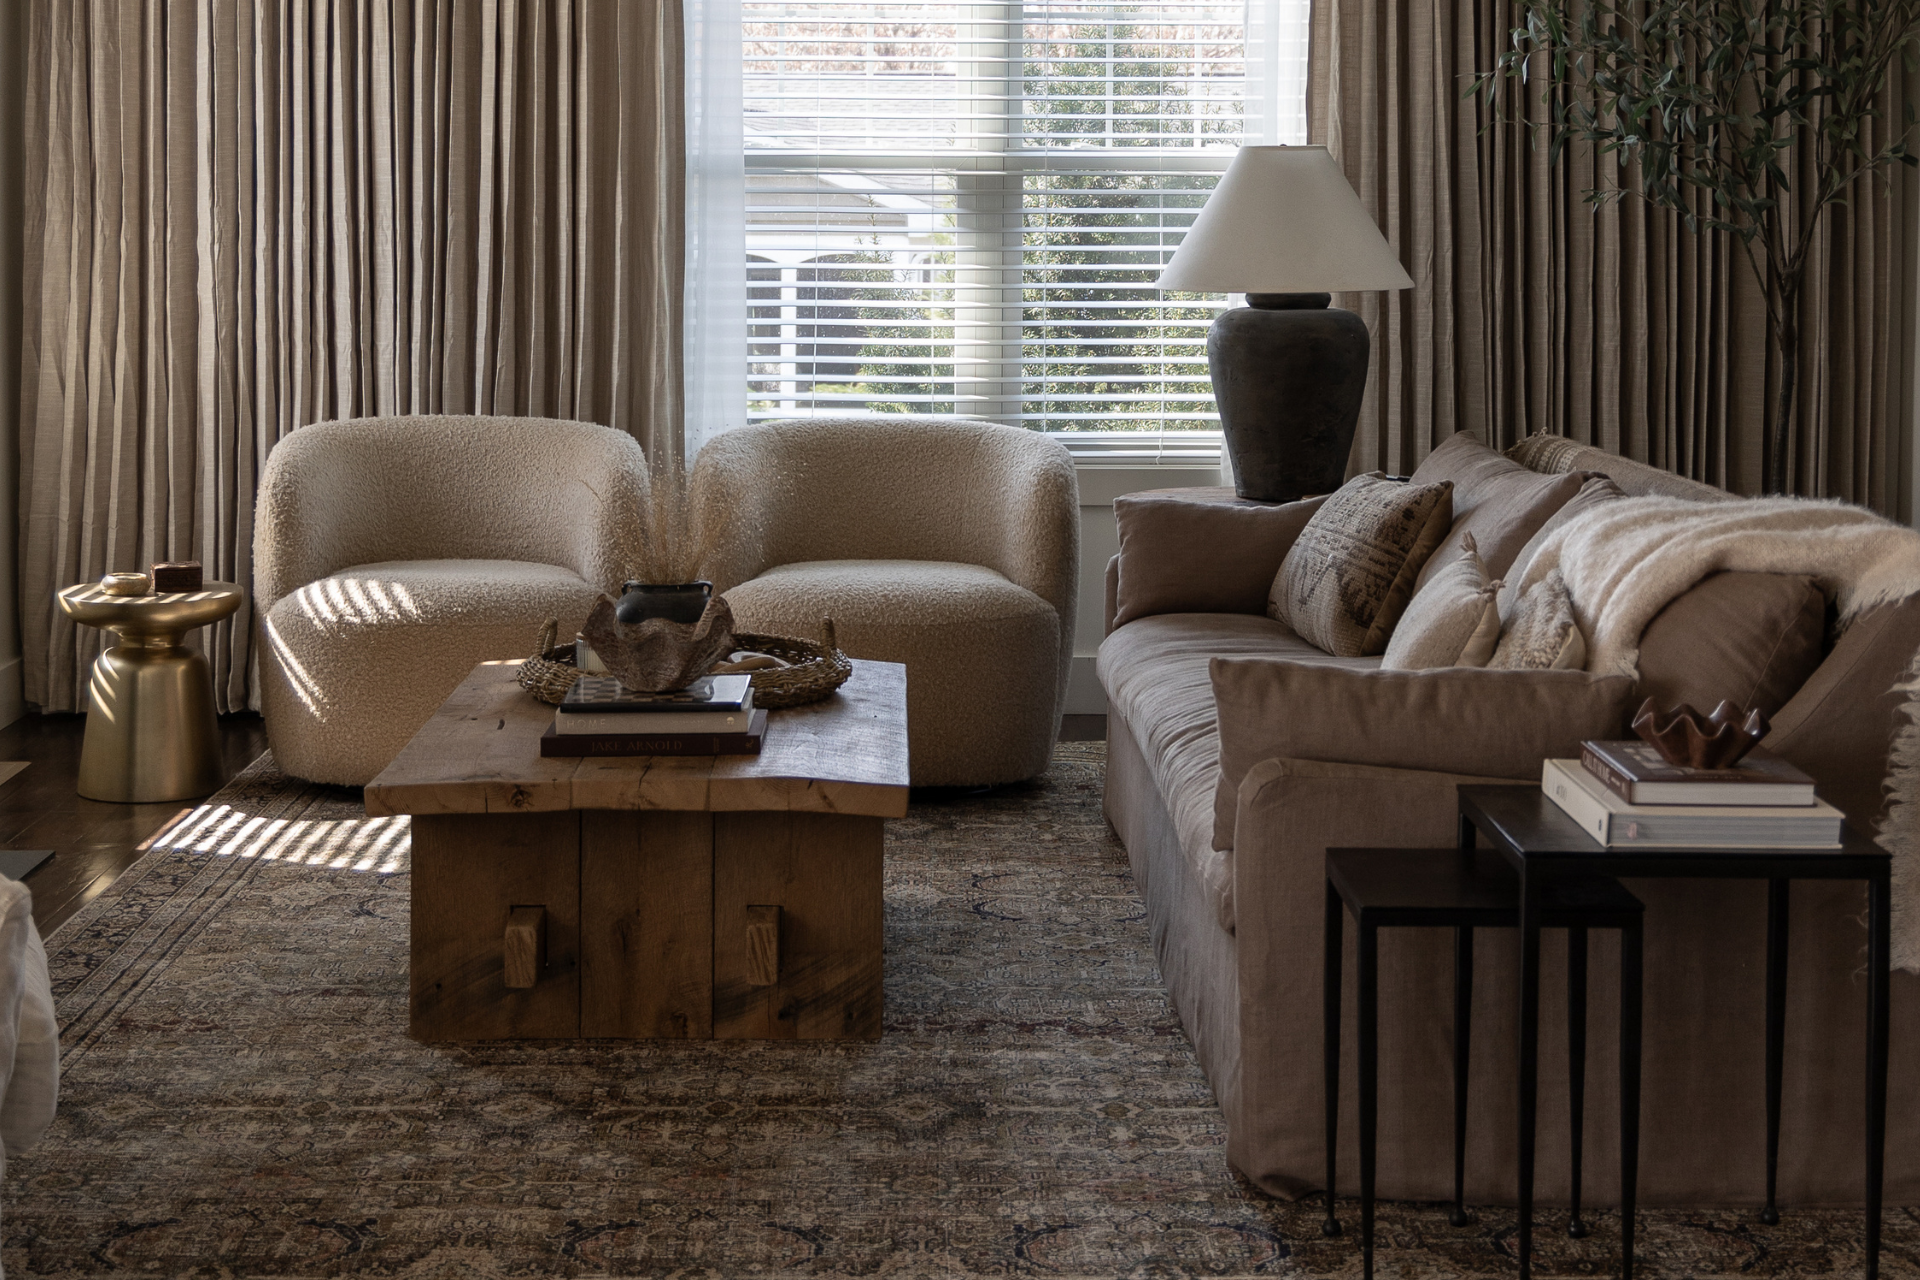
Have you ever fallen in love with something for your home and come to find out it’s waaaayyyy out of the budget? Yeah, it’s pretty much a daily occurrence for me, haha! I’ve been on the hunt for a coffee table for our living room refresh and this Joshua coffee table from Amber Interiors was “the one.” But at $4,400, that just wasn’t going to happen. After some planning and some scheming, I found a way to make it happen by building my own version.
THE MATERIALS
The materials for this project as are simple as can be… wood, glue, and screws. That’s it! I highly recommend using some nice, reclaimed wood if you can get your hands on it. Using quality lumber makes all the difference in the long run. It really takes the build to the next level and makes it much more unique and aesthetically pleasing. I am using reclaimed white oak 2X boards in varying widths. If you know anything about reclaimed lumber, a 2X board is just that— a full 2” thick. The actual size of a 2X board in a box store is 1 ½” thick.

THE TABLETOP
Let’s start by assembling the tabletop. The best part about building your own furniture is that you can customize the size to meet your needs. For our living room space, I am making our coffee table 48” long by 30 ½” wide by 16” tall.
My boards vary in width, but I managed to find a combination that works out to be 30 ½” wide. You will want to roughly cut down the length of the boards so it will be easier to assemble. We’ll make a final cut to clean up with edges after everything is glued up and screwed together.
Take each of your boards and drill some pocket holes about every 12” or so in alternating directions. With some pipe clamps in place, I am getting my boards laid out and ready for glue. You’ll want to spread glue along any edge where a board will meet another board. Once the glue is spread, you can clamp everything tightly together and start screwing it together with pocket holes.
After your tabletop has had time to dry, we will cut it down to its final size of 48” in length. Make a nice, straight clean cut on both ends.


THE TABLE LEGS
The legs are going to be slightly offset from the tabletop by 1 ½” on each side. We’re going to basically repeat exactly what we did for the tabletop; except this time, it will be 27 ½” wide instead of 30 ½” wide. In order to do this, we will rip 1 ½” off each of the two outer boards.
Each of our legs will stand 14” tall (14” tall plus 2” thick tabletop brings the overall coffee table height to 16” tall). Once again, I roughly cut down the length to about 30″ so that I would be able to cut out two 14” legs.
I set up my boards on the pipe clamps again, with the ripped cut sides facing in. Same process as the tabletop for attaching them together… glue and pocket hole screws.


THE BRACES
There are two braces that run between the legs of the coffee table. I’m using reclaimed 2×4 boards for the braces and each of them is 44 ½” in length.
To connect the braces and the table legs, we need to cut out two holes in each of the legs. The easiest way to do this is to chop off a little slice of wood from your 2×4, position it on your table leg, and trace it. I used my jig saw to cut out the holes.


ASSEMBLING THE COFFEE TABLE
It’s finally time to put all of these pieces together! We’re going to start by attaching the table legs to the tabletop and then adding the braces. With the tabletop upside-down, secure the table legs to the tabletop with glue and pocket hole screws. My table legs are offset 6” from the ends of the tabletop. You’ll have a little wiggle room before the glue dries to get everything square.
Next, we’ll add the braces and get them centered between the table legs. At this point, you can make some adjustments to your table legs to make sure they sit square with the tabletop. I added a few pocket hole screws (from the inside) to keep the braces secured to the table legs.


THE COMPLETED COFFEE TABLE DUPE
As far as the finishing work, I did not apply any stain or finish to my table. The natural color of the reclaimed wood was beautiful enough for me. I did a light sand and took a wire brush to it so it has a raw, but not too rough surface.
What do you think? Close enough to my inspiration coffee table?


Sources
Joshua Coffee Table | Rug | Rug pad | Woven tray | Vase | Vase 2 | Vase filler | Olive tree | Console Table | Artwork | Book 1 | Book 2 | Coasters | Pillow 1 | Pillow 2 | Pillow 3 | Curtains | Curtain rod | Ceiling fan | Side table

*This post contains affiliate links*


12 Responses
How much does this coffee table weigh?
It is rather heavy! But two people can easily lift it
Can you share where you got the wood?
I got it locally from a place called Northeast Reclaimed Lumber. Highly recommend!
I read your post first and then looked up the inspiration table. I like YOURS better. Theirs is priced at 5800 now. Crazy. I’m sure your reclaimed wood wasn’t cheap. Do you have any idea what your table cost for materials?
So crazy expensive right?! Aw thank you so much! I don’t remember exactly what I paid for the wood, but I think it was somewhere between $150-$300
It is beautiful . What glue did you use?
Thank you! Just wood glue
Your table is beautiful! How did you get the cut edges to look “aged” like the rest of the wood? I am following your tutorial and my table looks great except for the edges
I am no sure? Must have just been the age of the wood. I didn’t do anything to the cut edges.